

Dining table board game table simple conversion:
Hi fellow board gamers! This weekend I made a wee dining table conversion into a board game table. It was so stupid easy and turned out so well, I’m sharing it with you all. I’ll preface this by saying, I’m not a carpenter, I’m a wee mad woman with an idea and a screwdriver lol. I’m sure there are better ways to do this, but this worked for me and that’s why I’m sharing the love, in case it works for you too. This idea came to me when I was putting some photos in some frames, what if I made my table the glass in a board game frame…. BOARD GAME TABLE!
What you’ll need:
- Timber cut to size (I did this at my DIY store (Bunnings in Australia, I assume Home Depot in the US).
- A few screws of dif sizes.
- Screwdriver matching the screws and a drill bit that fits in your screwdriver.
- Pen, measuring tape / paper.
- Felt (in whatever color you like and big enough to cover your table. I doubled this on mine so it was thicker, totally up to you.
- 4 x small metal brackets (straight or cornered, I could only find cornered.
Measure around the outside of your table, so imagine you are putting a frame AROUND it, add 5 mm for the felt. Example, my table is 75cm by 150cm, so my initial frame measurements were 75.5cm x 150.5cm (or 755mm x 1505mm).
I got the inner frame timber in 3cm (30mm) square bits, two at 81.5cm (breakdown 75 for the table width, plus 3cm each side for the additional pieces on the sides plus the .5cm wiggle for the felt). For each side it is two at 150.5cm.
I’m hoping my crappy image below illustrates this super simple thing, better than my words:
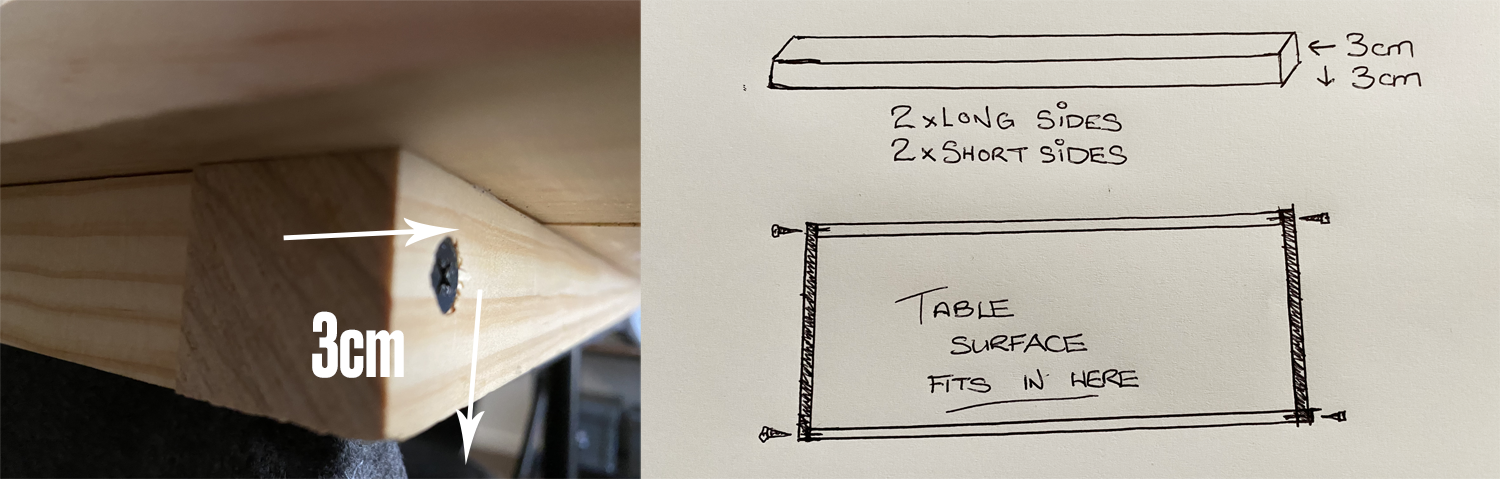
Screw it together as illustrated, just make sure your screws are long enough to go into the lengths. Also pops some PVA – wood – glue on there. Your under frame is done, test it now to make sure it fits around your table with a little bit of wiggle room for the felt that’s to come later. Next the top!
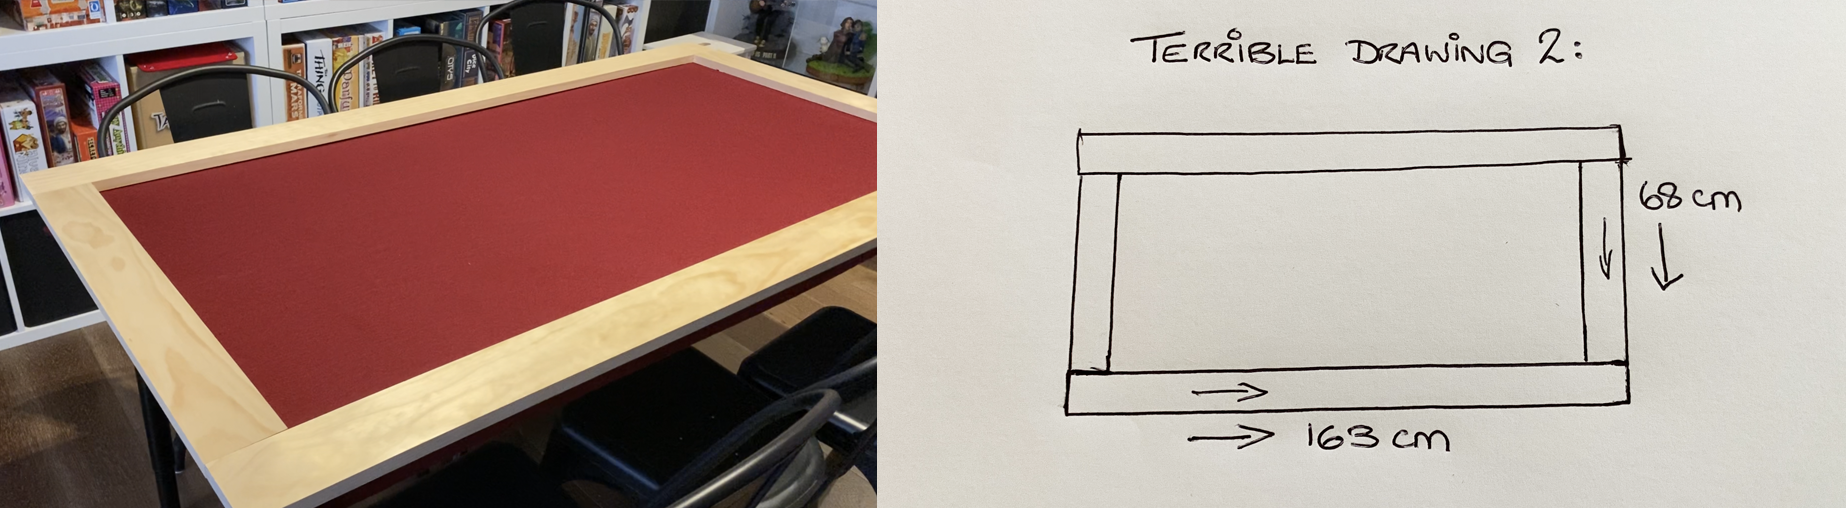
Same idea, but now we’re talking the frame, so these need to be wide enough to sit ON the table once the underframe is connected. I went with planks that were 2cm depth and 9cm wide and these work great. You need two for the short end and two for the long sides. Mine were: 2x 68cm and 2x 163cm.
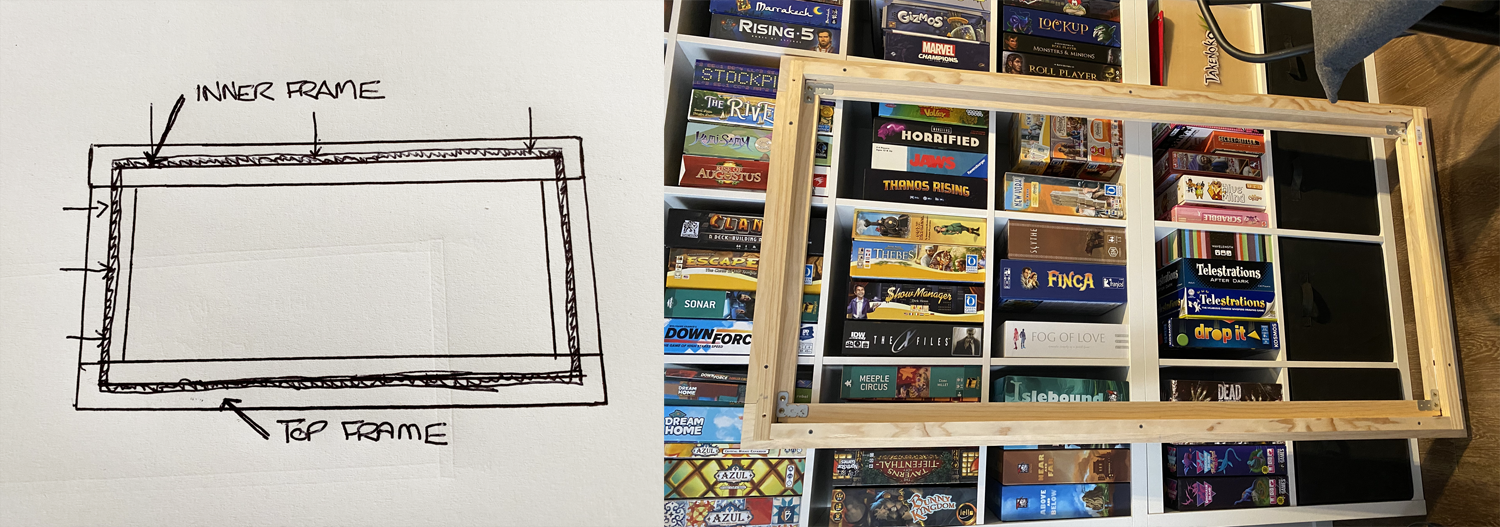
As stated above, lay these wide pieces on the floor in the shape of the table, then lay the inner frame you made earlier on top and shuffle pieces around to make it as close to center as you can. We’re now going to attach the underframe, to the top frame, to hold it all in place. NOTE: IF you have better tools than me, use dowels at either end of your smaller pieces into the long pieces. Had I actually had proper tools, I would have done this. Don’t worry though, we’ll use the wee metal brackets for more structural integrity and you won’t even see them.
Make sure your screws are long enough to go through the underframe and into the top, but not so long as they go all the way through!! Screw the thing all the way around, a few on each side. It should now be super solid (remember some PVA glue wherever wood is touching other wood.
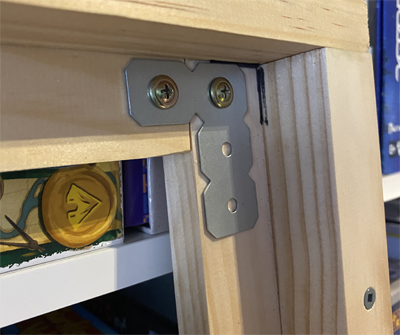
Last wee bit and this is to add some structural integrity, if you’ve managed to get dowels in, you probably won’t need this. The little brackets, just screw them so they’re adjoining the long pieces of wood to the short ones underneath the frame.
Do this at every corner. I couldn’t find straight brackets, so I just bought these angle ones, you can use whatever you feel so long as they’re flat, because this is going to sit on the table. That’s it, your “Board Game Frame” is made! Now for the felt.
For the felt I just bought two different colors (dark red and gray), but you could literally buy ANY material you like and place it over the felt also. So you’d still have a nice squishy table top for dice / picking up cards, but in a pattern you like (I pondered buying some nice Star Wars material for example). I bought a length twice as long as I needed so I could fold it over (double felt thickness!). That worked great, no dice noise, perfectly flat surface.
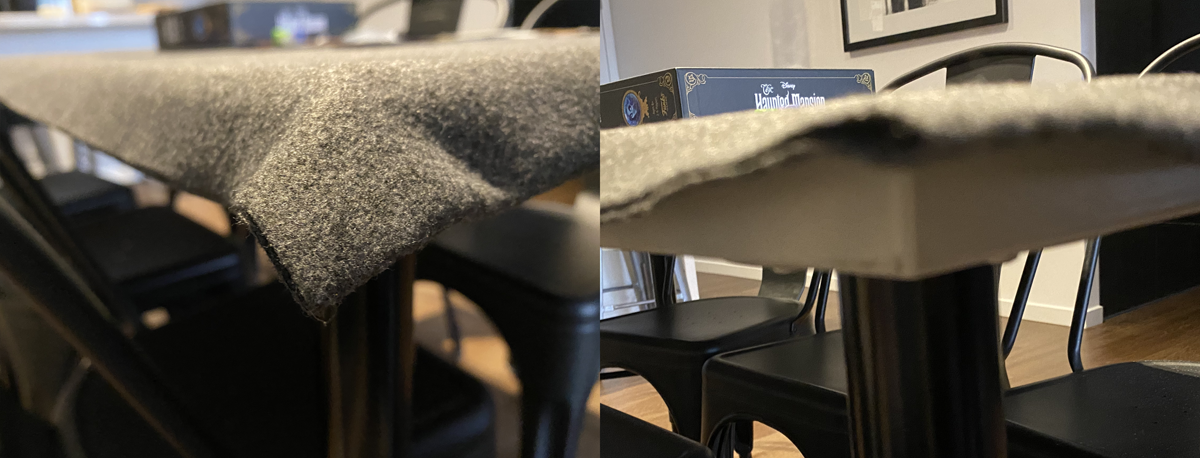
You shouldn’t need to cut the felt (they should do it in the store), but if you do, for single thickness the measurements on this particular table are: 81cm x 156cm (essentially your table area plus 2.5-3cm each side. I’ll add a photo for you of my felt with the frame off the table so you can picture it. The Felt just sits ON the table, flatten it with your hand and get someone to place the board game frame over it, it should be snug, push it down. The frame holds it in place perfectly.
That my fellow board gamers is that, $100 and around 2 hours work and I have my own board game table. I’m going to oil or varnish it as well when I get some time and looking into that. For a little starter board game table, it’s worked really great. If you use the board game frame idea, please give my wee channel a mention. I suck at self promotion and it would REALLY help me out if you did that for me.
Oh and obviously the board game frame just lifts off, roll up your felt and you have your regular table back. Just bring out the board game frame table topper when you need it.
Original video:
Hope this has helped you!
Be kind and have an awesome day.